
Install OpenSSL on Windows server 2019: A Step-by-Step Guide
Are you looking to secure your applications and safeguard information exchange between systems on Windows Server 2019? OpenSSL is your go-to open-source solution, offering a suite of cryptographic protocols for robust security. This toolkit, maintained by a global network of dedicated volunteers, supports both Secure Sockets Layer (SSL versions 2 and 3) and Transport Layer Security (TLS version 1) protocols, ensuring top-tier encryption. Follow this straightforward guide to get OpenSSL up and running on your Windows Server 2019. After downloading, initiate the setup by either double-clicking the `.exe` file or launching it via PowerShell with the following command:
 Navigating through the installation of OpenSSL on your Windows Server 2019 is straightforward. Begin by selecting the destination folder for OpenSSL installation during the setup process.Follow up by choosing a directory for the Application shortcut, ensuring easy access to OpenSSL from anywhere on your system.
 The setup wizard will then prompt you to select any additional tasks you wish to perform during the installation. This could include creating desktop shortcuts or registering OpenSSL as a system service.Proceed by clicking “Install” to initiate the OpenSSL installation on your Windows Server 2019. This process may take a few minutes, so a little patience is required.Once the installation wraps up, finalize it by clicking “Finish.” This step concludes the successful setup of OpenSSL on your server.
 To integrate OpenSSL seamlessly into your system’s operations, add C:\OpenSSL-Win64 to your Windows environment PATH using the following PowerShell commands:
 For those operating on a 32-bit system, simply substitute OpenSSL-Win64 with OpenSSL-Win32 in the path to match your system architecture.
What is OpenSSL?
OpenSSL is a powerful and widely used open-source software library that provides a robust set of cryptographic tools for securing communications over computer networks. Primarily, it implements the SSL (Secure Sockets Layer) and TLS (Transport Layer Security) protocols, offering encryption and security features to facilitate secure Internet communications and transactions. Besides its core functionalities of encrypting sessions and verifying the identity of servers and clients, OpenSSL also includes utilities for creating digital certificates, keys, and other cryptographic operations. It is maintained by a global community of volunteers, ensuring it remains up-to-date with the latest security standards and encryption techniques.Simple Steps to Install OpenSSL on Your Windows Server 2019
Dive into securing your server by downloading OpenSSL, a critical tool for cryptographic security on Windows Server 2019. Start by visiting the OpenSSL download page to find the version that aligns with your system’s architecture. I go for the 64-bit variant. You’ll see options for both a lightweight version and the full package. For those who prefer using the command line, the `curl.exe` command offers a straightforward way to download OpenSSL directly:curl.exe -L -o Win64OpenSSL.exe https://slproweb.com/download/Win64OpenSSL-3_0_0.exeBelow is an illustration of the process.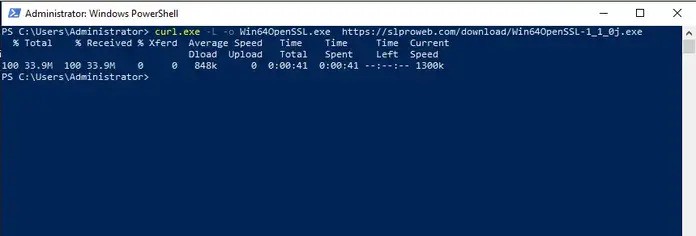 After downloading, initiate the setup by either double-clicking the `.exe` file or launching it via PowerShell with the following command:
.\Win64OpenSSL.exeProceed by agreeing to the Software License Agreement and clicking “Next” to continue with the installation.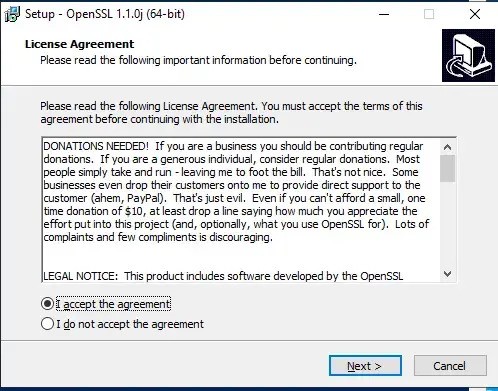 Navigating through the installation of OpenSSL on your Windows Server 2019 is straightforward. Begin by selecting the destination folder for OpenSSL installation during the setup process.Follow up by choosing a directory for the Application shortcut, ensuring easy access to OpenSSL from anywhere on your system.
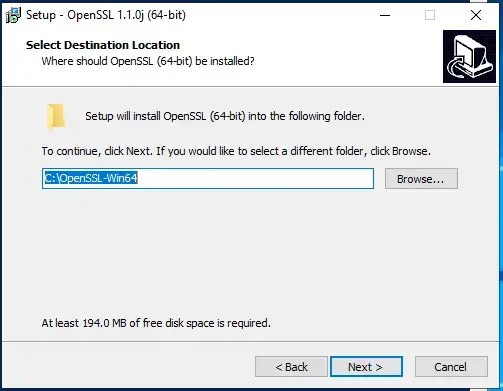 The setup wizard will then prompt you to select any additional tasks you wish to perform during the installation. This could include creating desktop shortcuts or registering OpenSSL as a system service.Proceed by clicking “Install” to initiate the OpenSSL installation on your Windows Server 2019. This process may take a few minutes, so a little patience is required.Once the installation wraps up, finalize it by clicking “Finish.” This step concludes the successful setup of OpenSSL on your server.
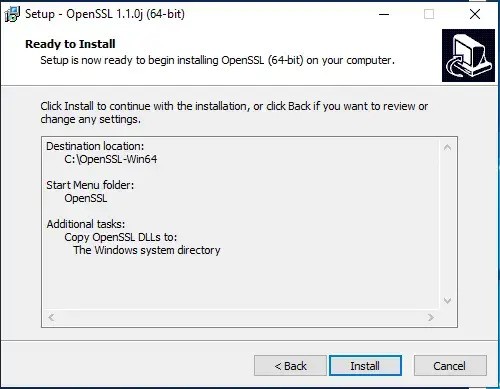 To integrate OpenSSL seamlessly into your system’s operations, add C:\OpenSSL-Win64 to your Windows environment PATH using the following PowerShell commands:
$userenv = [System.Environment]::GetEnvironmentVariable("Path", "User")[System.Environment]::SetEnvironmentVariable("PATH", $userenv + ";C:\OpenSSL-Win64\bin", "User")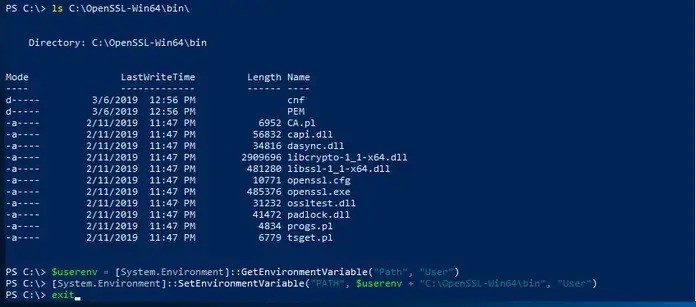 For those operating on a 32-bit system, simply substitute OpenSSL-Win64 with OpenSSL-Win32 in the path to match your system architecture.
Creating Certificates with OpenSSL on Windows Server 2019
Having successfully installed OpenSSL on Windows Server 2019, you’re now equipped to generate your own certificates. Begin this process by setting the OPENSSL_CONF environment variable:set OPENSSL_CONF=C:\OpenSSL-Win64\bin\openssl.cfgRemember, if you’re working on a 32-bit system, you should adjust the path to use OpenSSL-Win32 instead. Next, let’s proceed by generating a test SSL certificate to ensure everything is set up correctly:openssl.exe req -new -nodes -keyout server.key -out server.csr -newkey rsa:2048Feel free to explore more detailed guides and articles on our website for further reading and assistance.