
Easy Guide to Docker Compose Logs: How to Check and Manage
Ever wondered what your Docker apps are doing behind the scenes? Let’s dive into the fascinating world of Docker logs, the secret window into your containers’ activities, and learn how they can be invaluable for troubleshooting issues. But before we delve into logs, let’s briefly explore what Docker and Docker Compose are.
Contents
Docker Compose
Docker Compose, included with Docker, simplifies the development of multi-container applications by managing their services, networks, and storage. It chains together the components of your application, making it easier to manage complex setups. Docker container logs and Docker Compose logging are crucial for developers to monitor and understand what each container is doing.
Why Docker Compose Logs Matter
Curious about Docker Compose logs? You’re in the right place. This blog will explain the fundamentals of Docker Compose logs and explore advanced details to help you harness their full potential for your projects. By understanding these logs, you can gain insights into your containers’ behaviour, making troubleshooting and optimization much more straightforward.
Join us as we unravel the basics and advanced concepts of Docker Compose logs and learn how to make the most of Docker Compose for your projects.
The Importance of Docker Compose Logs
Imagine a developer launches an app with Docker but skips setting up Docker logs. Initially, everything seemed fine. But soon, users encounter errors, and the app slows down. Without Docker logs, the developer can’t diagnose what went wrong inside the Docker containers. Docker Compose logs act as a detailed record of these containers, capturing every detail of their operations. This detailed logging is crucial for identifying and fixing issues later.
As a Developer or System Admin, understanding the activities inside and between multi-chain applications is essential. This is where Docker Compose logs come in as an invaluable tool. So, why are these logs necessary?
- Troubleshooting and Debugging
When an application isn’t running correctly or encounters errors, Docker logs are the first resource to check. They allow developers to trace issues back to their root cause, whether it’s a bug in the code, a misconfiguration, or resource problems. By examining Docker logs, developers can quickly pinpoint and address these problems.
- Monitoring Application Health
Regular monitoring of application logs helps to understand the overall health of services. Logs can reveal early warning signs such as repeated errors and slow responses. Observing these patterns early can prevent potential issues from escalating.
- Audit and Compliance
For applications that need to adhere to specific standards, Docker logs are crucial. They provide evidence of whether the application complies with guidelines and plays an essential role in monitoring authorized and unauthorized activities.
- Optimization
Logs are valuable resources for software optimization by providing performance data. Developers can identify slow-running queries, inefficient code paths, or underutilized resources, enabling them to enhance the application’s performance and efficiency.
Crafting a Docker Recipe: Deploying a Web Server
In this section, we’ll walk through creating a Docker recipe together. To start our journey with Docker Compose logs, let’s deploy a web server. Follow these steps to set up your web server using Docker.
Navigate to your desired folder on your VPS and create a Dockerfile using the following command:
nano Dockerfile
Add the Following Contents to Your Dockerfile
Copy and paste the following contents into your Dockerfile, then save it:
FROM nginx: alpine
RUN rm /usr/share/nginx/html/index.html
EXPOSE 80
CMD ["nginx", "-g", "daemon off;"]
Explanation of the Dockerfile
– FROM nginx:alpine: We start with a lightweight base image, `nginx: alpine`.
– RUN rm /usr/share/nginx/html/index.html: Next, we remove the default Nginx welcome page.
– EXPOSE 80: We ensure that the web server listens on port 80.
– CMD ["nginx", "-g", "daemon off;"]: Finally, we run the Nginx server.
With the Dockerfile ready, we’ll move on to creating the Docker Compose file.
Create a Docker Compose File
Create a `docker-compose.yml` file with the following structure:
nano docker-compose.yml
Add the following contents to your `docker-compose.yml` file and save it:
version: ‘3.8’
services:
web:
build: .
ports:
– “8080:80”
volumes:
– ./index.html:/usr/share/nginx/html/index.html
Explanation of the Docker Compose File
– version: ‘3.8’: We’re using Docker Compose version 3.8.
– services: Defines the services for the application.
– web: Names our service “web”.
– build: .: Instructs Docker to build our web server from the current directory.
– ports: Maps port 8080 on the host to port 80 in the container, enabling the web server connection.
– volumes: Maps `index.html` from the host to the container. You can create an `index.html` file with any content and place it in the same directory as the Dockerfile and docker-compose.yml.
Final Steps
- Create an `index.html` file in the same directory as your Dockerfile and `docker-compose.yml` with any desired content.
- Run the following command to build and start your web server:
docker-compose up
By following these steps, you’ll have a web server up and running in a Docker container, ready to help you explore Docker Compose logs and better understand containerized application management.
Running Your Docker Container with Docker Compose
Now it’s time to run our Docker container using Docker Compose. Simply execute the following command:
docker-compose up
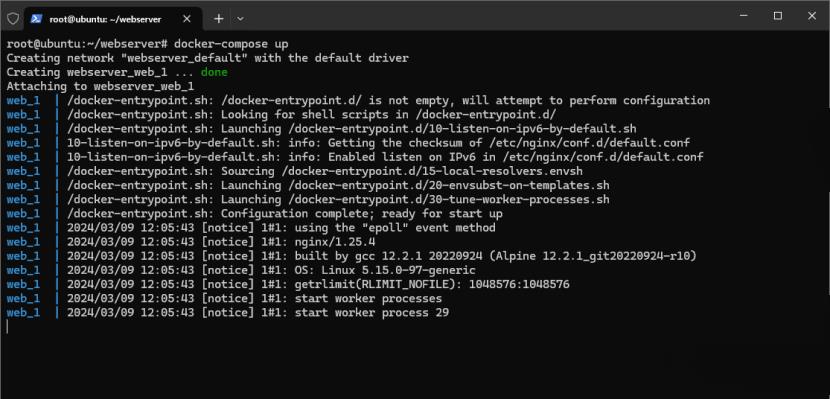
Running Docker Container with Docker Compose
When you run the `docker-compose up` command, Docker will download the necessary images from the internet and configure them according to our `Dockerfile` and `docker-compose.yml` files.
Checking if Your Web Server is Running
To verify that your web server is up and running, open your web browser, enter your VPS IP address, and request access to port 8080. You should see the content displayed in your `index.html` file.

As a side note, if you want to run the container in the background, use the following command:
docker-compose up -d
This will run the container in detached mode, allowing you to continue using your terminal for other tasks.
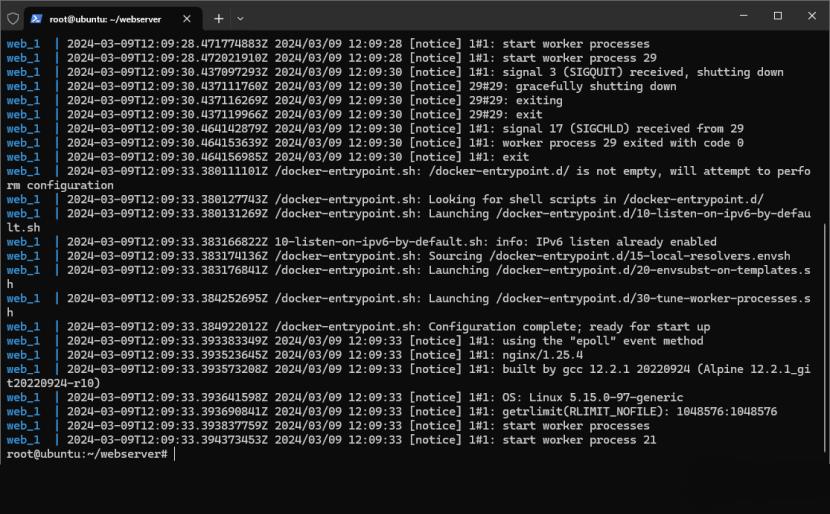
Accessing Logs with Docker Compose
Now that our web server is up and running, it’s generating logs that are essential for troubleshooting and monitoring. Accessing your Docker Compose logs is straightforward and crucial for maintaining the health of your applications. Here’s how you can read and manage these logs effectively.
Viewing Docker Compose Logs
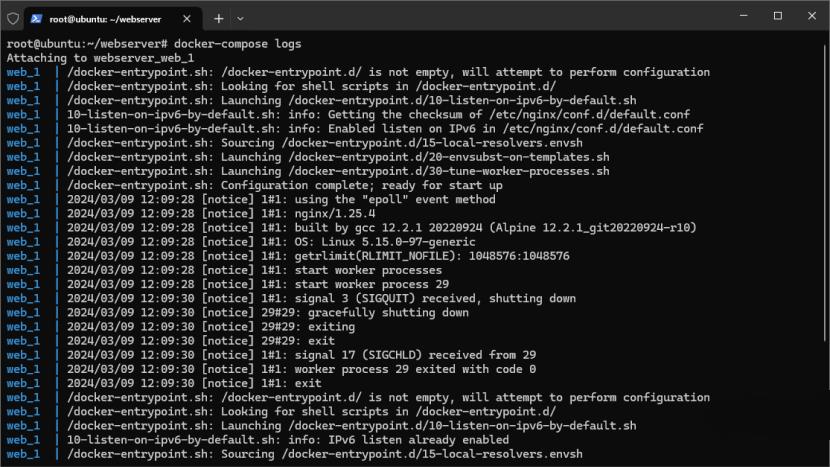
To access the logs, navigate to the directory containing your configuration files and run:
docker-compose logs
This command will display the logs for all services defined in your `docker-compose.yml` file.

Live Log Streaming
If you want to see the logs in real-time as they are being generated, add the `-f` option to your command:
docker-compose logs -f
This will stream the live logs, allowing you to monitor your services continuously.
Logs with Timestamps
Some Docker-based applications might not include timestamps in their logs by default. To add timestamps to each log entry, use the `-t` option:
docker-compose logs -t
This command will append a timestamp to each line, helping you track when each event occurred.
Viewing Recent Log Entries
To quickly check the most recent activity, you can use the `--tail` option. For example, to see the last 10 log entries, run:
docker-compose logs --tail 10
This is particularly useful when you want to inspect recent events without scrolling through the entire log history.

Viewing Logs for Specific Services
In multi-container applications, you may need to access logs for a specific service. To do this, use the following command, replacing `SERVICE` with the name of your service:
docker-compose logs -f SERVICE
This will display the logs for the specified service, allowing you to focus on particular components of your application.
By using these commands, you can efficiently access and manage your Docker Compose logs, ensuring you have the necessary insights to maintain and troubleshoot your applications.
Docker Logging
The Docker ecosystem can become increasingly complex, especially in large environments with converged applications. Each container generates logs, and a mechanism known as the Logging Driver is responsible for receiving, delivering, and storing these logs. By default, Docker uses JSON files for the Logging Driver, but it supports various other drivers, each with its pros and cons.
Logs are essential for several reasons, including troubleshooting and enhancing system performance. Below, we will cover two of the main aspects of using container logs:
- Monitoring
Logs’ primary purpose is monitoring. They provide insights into the overall health of our containerized applications, helping us understand their performance and stability.
- Troubleshooting
In the event of issues, logs are invaluable for detecting application glitches and diagnosing problems, allowing us to address them promptly.
- Managing Log Storage with Log Rotation Policy
As Docker logs and Docker Compose logs are continuously generated, they can eventually fill up all the VPS storage. To prevent this, we need a strategy to manage disk space, known as a Log Rotation Policy. Here’s how to implement it:
- Modify Your docker-compose.yml File
Open your `docker-compose.yml` file and add a logging section with the following configuration:
version: ‘3.8’
services:
web:
build: .
ports:
– “8080:80”
volumes:
- ./index.htm:/usr/share/nginx/html/index.htm
logging:
driver: json-file
options:
max-size: “200k”
max-file: “10”
Explanation of the Logging Configuration
– driver: JSON-file: Specifies the logging driver. In this case, we’re using the default JSON file driver.
– max-size: “200k”: Limits the size of each log file to 200 kilobytes.
– max-file: “10”: Keeps a maximum of 10 log files. When the limit is reached, the oldest log file is deleted to make room for new entries.
You can adjust `max-size` and `max-file` according to your needs to ensure efficient log management and prevent your storage from filling up.
By implementing a Log Rotation Policy, you can manage your logs effectively, ensuring that your VPS storage remains under control while maintaining the valuable insights provided by Docker logs.
Conclusion
Understanding Docker Compose logs is crucial for effectively managing and debugging your Docker applications. By learning to access and monitor these logs, you can improve problem-solving, enhance your app’s performance, and bolster security. Whether you are a developer or a system administrator, leveraging Docker Compose logs is essential for efficient container management. Embrace these tools to ensure your applications run smoothly and reliably.

boyarka
6 November 2025I believe everything typed made a bunchh of sense.
But, what about this? what if you composed a catchier
title? I mean, I don’t want too tell you howw to run your blog, however what
if you added a title that majes people want more? I mean Guide simple des journaux Docker Compose : comment vérifier
et gérer is kinda vanilla. You could glance at Yahoo’s front page and watch how thdy
creatte post titles to grab people to click. You might try
adding a video or a pic oor two to get people
excited about what you’ve written. In my opinion, it could bring your posts a little
livelier.
ALis
11 November 2025Thank you for sharing your thoughts — we really appreciate your honest feedback and will take it into account. 🙏
boyarka
10 November 2025Hi there would you mind sharing which blog platform you’re
using? I’m planning tto start my own blog soon but I’m having a tough time making a decision between BlogEngine/Wordpress/B2evolution and Drupal.
Thhe reason I ask is because your design and style seems differen then most blogs and I’m looking for something unique.
P.S My apologies for being off-topic but I hhad to ask!
ALis
11 November 2025Hi! Thanks for your nice comment 😊
We’re using WordPress with a customized theme to make the design unique. It’s user-friendly and great for most blogs. Good luck with your new project! 🚀