
How to Install V2ray on windows
Are you looking to secure your applications and safeguard information exchange between systems on Windows Server 2019? OpenSSL is your go-to open-source solution, offering a suite of cryptographic protocols for robust security. This toolkit, maintained by a global network of dedicated volunteers, supports both Secure Sockets Layer (SSL versions 2 and 3) and Transport Layer Security (TLS version 1) protocols, ensuring top-tier encryption. Follow this straightforward guide to get OpenSSL up and running on your Windows Server 2019. After downloading, initiate the setup by either double-clicking the `.exe` file or launching it via PowerShell with the following command:
 Navigating through the installation of OpenSSL on your Windows Server 2019 is straightforward. Begin by selecting the destination folder for OpenSSL installation during the setup process.Follow up by choosing a directory for the Application shortcut, ensuring easy access to OpenSSL from anywhere on your system.
 The setup wizard will then prompt you to select any additional tasks you wish to perform during the installation. This could include creating desktop shortcuts or registering OpenSSL as a system service.Proceed by clicking “Install” to initiate the OpenSSL installation on your Windows Server 2019. This process may take a few minutes, so a little patience is required.Once the installation wraps up, finalize it by clicking “Finish.” This step concludes the successful setup of OpenSSL on your server.
 To integrate OpenSSL seamlessly into your system’s operations, add C:\OpenSSL-Win64 to your Windows environment PATH using the following PowerShell commands:
 For those operating on a 32-bit system, simply substitute OpenSSL-Win64 with OpenSSL-Win32 in the path to match your system architecture.
What is OpenSSL?
OpenSSL is a powerful and widely used open-source software library that provides a robust set of cryptographic tools for securing communications over computer networks. Primarily, it implements the SSL (Secure Sockets Layer) and TLS (Transport Layer Security) protocols, offering encryption and security features to facilitate secure Internet communications and transactions. Besides its core functionalities of encrypting sessions and verifying the identity of servers and clients, OpenSSL also includes utilities for creating digital certificates, keys, and other cryptographic operations. It is maintained by a global community of volunteers, ensuring it remains up-to-date with the latest security standards and encryption techniques.Simple Steps to Install OpenSSL on Your Windows Server 2019
Dive into securing your server by downloading OpenSSL, a critical tool for cryptographic security on Windows Server 2019. Start by visiting the OpenSSL download page to find the version that aligns with your system’s architecture. I go for the 64-bit variant. You’ll see options for both a lightweight version and the full package.For those who prefer using the command line, the `curl.exe` command offers a straightforward way to download OpenSSL directly:curl.exe -L -o Win64OpenSSL.exe https://slproweb.com/download/Win64OpenSSL-3_0_0.exeBelow is an illustration of the process.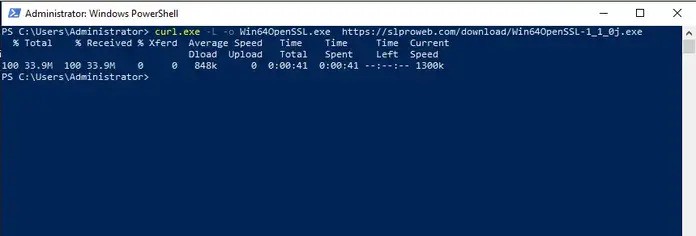 After downloading, initiate the setup by either double-clicking the `.exe` file or launching it via PowerShell with the following command:
.\Win64OpenSSL.exeProceed by agreeing to the Software License Agreement and clicking “Next” to continue with the installation.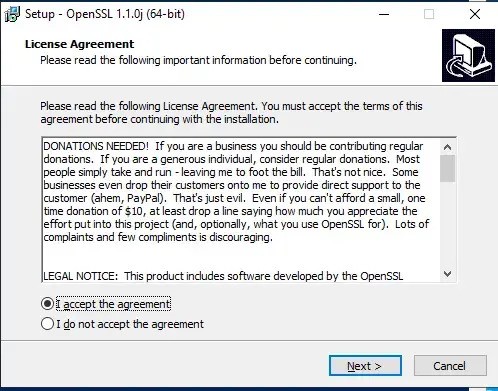 Navigating through the installation of OpenSSL on your Windows Server 2019 is straightforward. Begin by selecting the destination folder for OpenSSL installation during the setup process.Follow up by choosing a directory for the Application shortcut, ensuring easy access to OpenSSL from anywhere on your system.
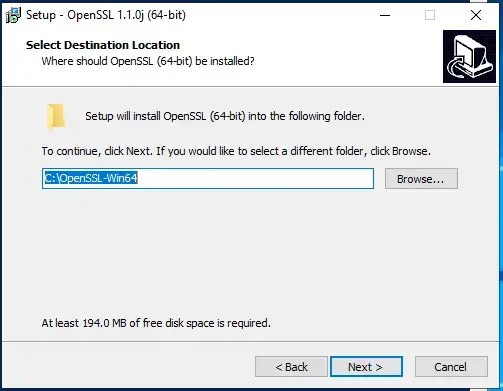 The setup wizard will then prompt you to select any additional tasks you wish to perform during the installation. This could include creating desktop shortcuts or registering OpenSSL as a system service.Proceed by clicking “Install” to initiate the OpenSSL installation on your Windows Server 2019. This process may take a few minutes, so a little patience is required.Once the installation wraps up, finalize it by clicking “Finish.” This step concludes the successful setup of OpenSSL on your server.
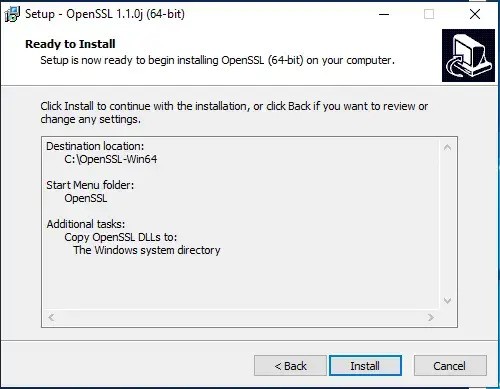 To integrate OpenSSL seamlessly into your system’s operations, add C:\OpenSSL-Win64 to your Windows environment PATH using the following PowerShell commands:
$userenv = [System.Environment]::GetEnvironmentVariable("Path", "User")[System.Environment]::SetEnvironmentVariable("PATH", $userenv + ";C:\OpenSSL-Win64\bin", "User")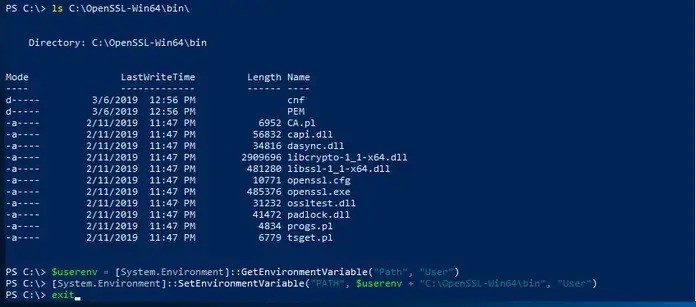 For those operating on a 32-bit system, simply substitute OpenSSL-Win64 with OpenSSL-Win32 in the path to match your system architecture.
Creating Certificates with OpenSSL on Windows Server 2019
Having successfully installed OpenSSL on Windows Server 2019, you’re now equipped to generate your own certificates. Begin this process by setting the OPENSSL_CONF environment variable:set OPENSSL_CONF=C:\OpenSSL-Win64\bin\openssl.cfgRemember, if you’re working on a 32-bit system, you should adjust the path to use OpenSSL-Win32 instead. Next, let’s proceed by generating a test SSL certificate to ensure everything is set up correctly:openssl.exe req -new -nodes -keyout server.key -out server.csr -newkey rsa:2048Feel free to explore more detailed guides and articles on our website for further reading and assistance.Conclusion
Securing your Windows Server 2019 with OpenSSL is made easy with this guide, designed to enhance application security and secure system communications. OpenSSL, a widely embraced open-source toolkit, offers a comprehensive set of cryptographic protocols, including SSL and TLS, for robust encryption and secure data exchange. This guide simplifies the installation process, from downloading the correct version of OpenSSL to configuring your system to integrate OpenSSL seamlessly. It also includes steps for generating your certificates and ensuring your server communications are encrypted and secure. Aimed at both beginners and experienced users, this tutorial provides all the necessary instructions to successfully implement OpenSSL, safeguarding your digital environment against vulnerabilities and threats.
V2Ray is a powerful tool designed to help users bypass online censorship and access restricted websites. It’s widely used in regions where internet access is heavily regulated.V2Ray achieves this by utilizing various techniques such as proxies, Shadowsocks, and protocols like VLESS, VMess, and Trojan. By encrypting your internet traffic and routing it through a network of servers, V2Ray makes it challenging for authorities to block specific websites or monitor your online activities.There are several ways V2Ray can help you get around online censorship. Firstly, it allows you to visit blocked websites by redirecting your traffic through servers located in countries where those sites are accessible. Secondly, by encrypting your data, V2Ray makes it harder for authorities to track and censor your internet usage. Lastly, it can disguise your traffic to look like normal web activity, helping you bypass firewalls and other censorship tools.
 To install V2rayN, follow these steps:
 Once you have switched the language to English, close the app by right-clicking its icon in the bottom right corner of your screen, as shown in the image below.
 Next, restart the app by double-clicking on the `v2rayN.exe` file located in the folder where you extracted the zip file.
 Once you’ve added the server, click on it to connect. Activate the server by pressing the Enter key. You’ll know the server is activated when its name changes to blue (this color change happens in the dark theme).Next, find the V2rayN icon in the bottom right corner of your Windows taskbar. Right-click it and select “Set up system proxy” to route your internet traffic through the V2rayN server.
 This optional method gives you full control over configuring and connecting to your preferred V2Ray server in V2rayN.
V2rayN: A Windows Client for V2Ray
V2rayN is a Windows client designed for V2Ray, offering a graphical user interface (GUI) to simplify the use of this powerful tool for bypassing internet censorship. With V2rayN, users can easily access and manage their V2Ray servers, making it a convenient option for those looking to navigate restricted online environments. This software is both free and open-source.V2rayN comes with several features that enhance the V2Ray experience. Users can quickly switch between different servers, set up custom routing rules, and monitor their connection status. Additionally, it offers automatic connection options and the ability to export and import configuration files, further streamlining the process of managing your online connections.Features of V2rayN
– Protocol Support: V2rayN supports a variety of protocols, including V2Ray, Shadowsocks, Trojan, and VMess, providing flexibility in how you connect and interact with networks.– Multi-Server Connectivity: You can connect to multiple servers simultaneously using V2rayN, enabling seamless management of different network environments from a single interface.– Custom Routing Rules: V2rayN allows users to configure custom routing rules, tailoring how data is routed through networks based on specific criteria or preferences. – Configuration File Management: Easily import and export configuration files with V2rayN, simplifying the setup and transfer of personalized network settings across devices.– Obfuscation Techniques: Enhance security and privacy with V2rayN’s support for obfuscation methods such as HTTP/2, QUIC, and WebSocket, masking network traffic to evade censorship and surveillance.Download V2rayN
You can download V2rayN directly from the official website. Simply follow the link below to get started:V2rayN Download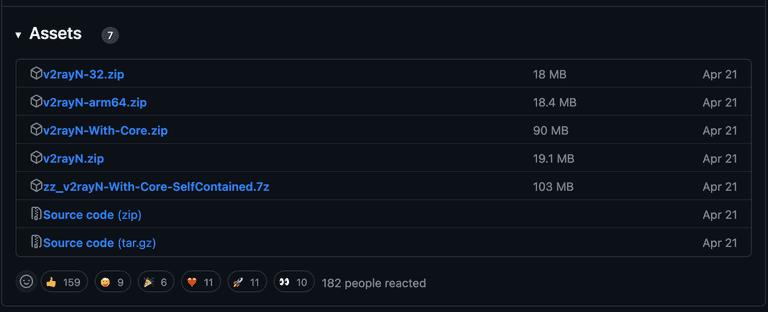
Which Version of V2rayN Should I Download?
- Windows x64
- Windows x86
- Windows arm64
Choosing the Right V2rayN Version
Your choice depends on your system and whether you have the Core files already. For new users, it’s best to download a package that includes the Core files. If you already have them, go for a package without the Core files. The standalone package is convenient if you don’t want to install additional runtimes.Once you have downloaded and installed V2rayN, open it. You should see a screen that looks similar to this: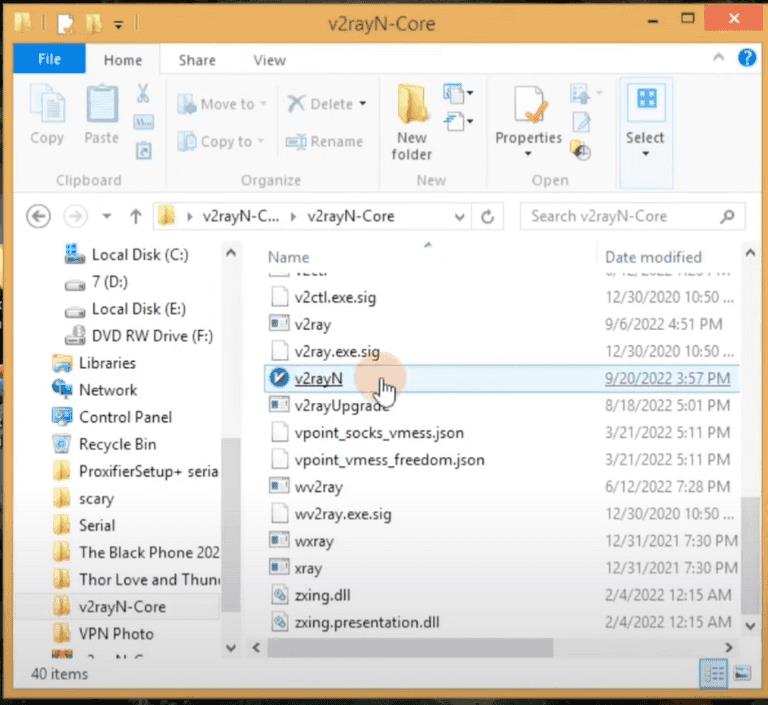 To install V2rayN, follow these steps:
- Extract the downloaded zip file and run `v2rayN.exe`.
- Place the V2rayN client folder on your desktop or another preferred location.
- Do not delete this folder after installation, as it is necessary for running the V2rayN client.
Changing the Language to English
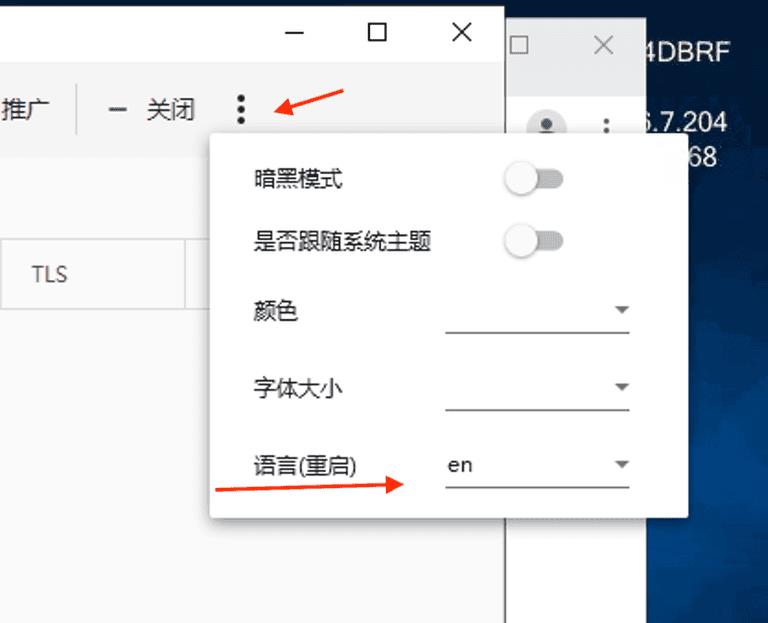
If V2rayN appears in Chinese after installation, follow these steps to change it to English:- Look for the icon shown in the image below and click on it.
- Change the language setting to English.
- Close the app by clicking the “X” in the top right corner.
 Once you have switched the language to English, close the app by right-clicking its icon in the bottom right corner of your screen, as shown in the image below.
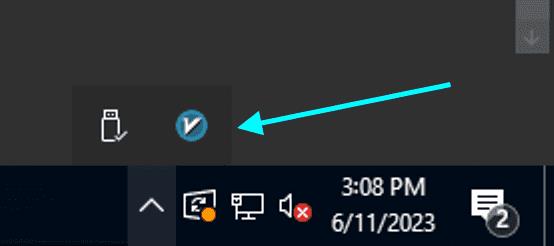 Next, restart the app by double-clicking on the `v2rayN.exe` file located in the folder where you extracted the zip file.
Adding a Server in V2rayN
To start using V2rayN, you need to add a server. Here’s how you can do it:- Obtain a V2rayN server.
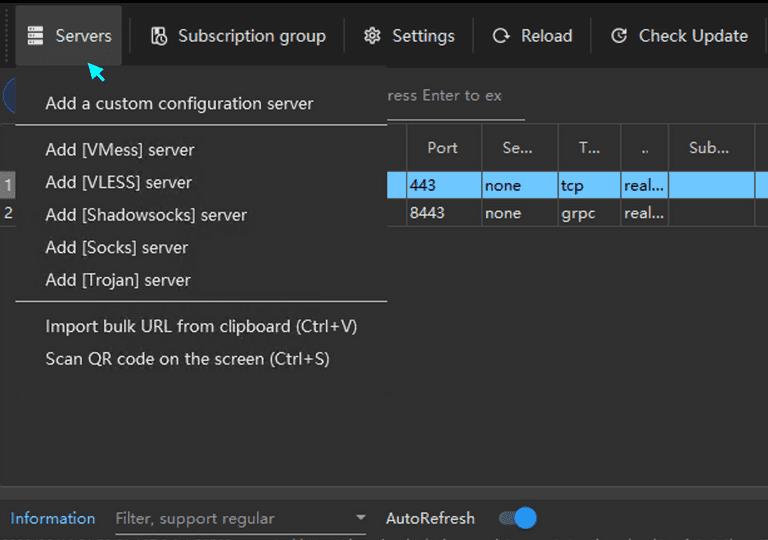
- In the V2rayN app, navigate to the Servers section.
- Select the “Import bulk URL from Clipboard” option.
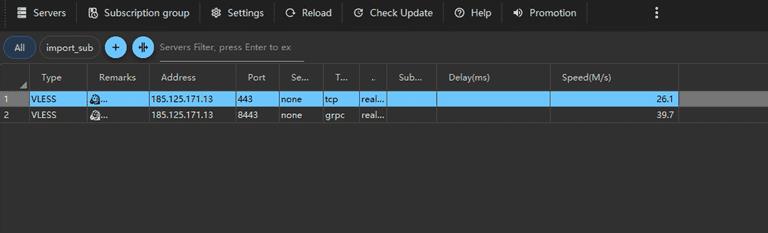 Once you’ve added the server, click on it to connect. Activate the server by pressing the Enter key. You’ll know the server is activated when its name changes to blue (this color change happens in the dark theme).Next, find the V2rayN icon in the bottom right corner of your Windows taskbar. Right-click it and select “Set up system proxy” to route your internet traffic through the V2rayN server.
Manually Adding a Server
If you prefer to add a server manually in V2rayN, follow these steps:- Navigate to the Servers section and choose “Add V2Ray server.”
- Enter the server address, port, user ID, and any other required information. Click OK to save.
- After adding the server, select it and connect by pressing the Enter key.
- To enable internet usage through the V2rayN server, find the V2rayN icon in the bottom right of your screen and select “Set up system proxy.”
 This optional method gives you full control over configuring and connecting to your preferred V2Ray server in V2rayN.