
How to Set Up a Floating IP on a VPS
Keeping a website or online service available at all times is one of the most important goals for any server administrator. If a server suddenly crashes or becomes unreachable, visitors may lose access to the website, game server, or application. This can lead to downtime, lost customers, and reduced trust.
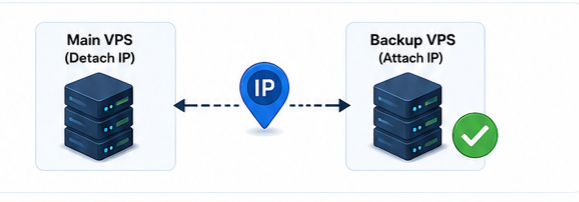
A floating IP helps solve this problem by allowing an IP address to move between servers instantly. Instead of changing DNS records and waiting for propagation, you can simply attach the floating IP to another VPS and continue serving users without interruption.
This guide explains everything you need to know about floating IPs, including their benefits, use cases, setup process, testing, and troubleshooting.
What Is a Floating IP?
A floating IP is a public IP address that is not permanently tied to one specific server. It can be reassigned between multiple VPS instances within the same network or cloud infrastructure.
For example, if your main VPS stops working, you can quickly move the floating IP to a backup server. Visitors will continue using the same IP address and usually will not notice the server change.
Floating IPs are commonly used for:
- High availability
- Failover systems
- Load balancing
- Backup servers
- Maintenance operations
- Reducing downtime
Unlike traditional static IPs, floating IPs provide much more flexibility and scalability.
Why Use a Floating IP on Your VPS?
Using a floating IP offers several advantages for businesses, developers, and server administrators.
Contents
- Improved Uptime
- Faster Failover
- Easier Server Maintenance
- Better Scalability
- Enhanced User Experience
- E-Commerce Websites
- Game Servers
- Database Clusters
- Web Applications
- Step 1: Log In to Your VPS Provider Dashboard
- Step 2: Create or Allocate a Floating IP
- Ubuntu/Debian
- CentOS/RHEL
- Ping Test
- SSH Test
- Website Test
- How to Test Failover
- Floating IP Cannot Be Reached
- SSH Connection Refused
- Website Does Not Load
Improved Uptime
If the primary server fails, the floating IP can instantly move to another server. This minimizes downtime and keeps services online.
Faster Failover
DNS changes can take hours to propagate globally. Floating IP reassignment usually happens within seconds.
Easier Server Maintenance
You can temporarily move the floating IP to another server while performing upgrades or maintenance.
Better Scalability
Floating IPs work well with load balancers and clustered environments where traffic is distributed across multiple servers.
Enhanced User Experience
Users continue accessing the same IP address without changing bookmarks, settings, or configurations.
Common Use Cases for Floating IPs
Floating IPs are useful in many real-world scenarios.
E-Commerce Websites
Online stores need continuous uptime. A floating IP allows traffic to move to a backup server during hardware failures or maintenance.
Game Servers
Multiplayer game servers can quickly recover from crashes by reassigning the floating IP to another VPS.
Database Clusters
Database replication systems often use floating IPs to switch traffic to a standby database server.
Web Applications
Applications that require high availability often use floating IPs with load balancers and failover systems.
Requirements Before Setting Up a Floating IP
Before starting the setup process, make sure you have the following:
- An active VPS server
- A VPS provider that supports floating IPs
- Root or sudo access
- Basic SSH knowledge
- A backup server (recommended)
- Firewall access
- Networking permissions
Complete Step-by-Step Guide to Set Up a Floating IP on a VPS
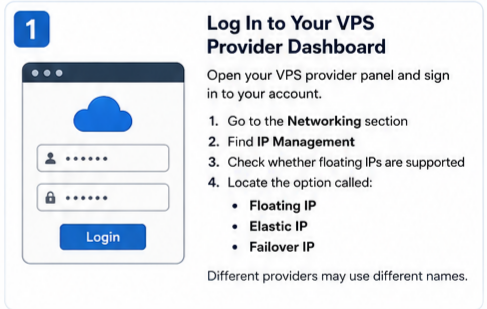
Step 1: Log In to Your VPS Provider Dashboard
Open your VPS provider panel and sign in to your account.
After logging in:
- Go to the Networking section
- Find IP Management
- Check whether floating IPs are supported
- Locate the option called:
- Floating IP
- Elastic IP
- Failover IP
Different providers may use different names.
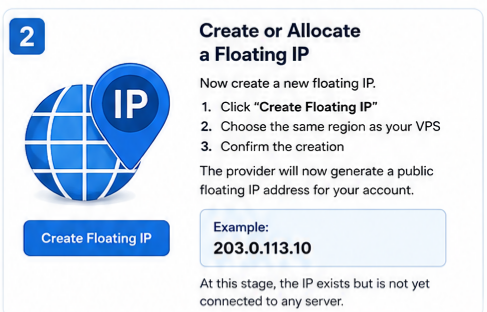
Step 2: Create or Allocate a Floating IP
Now create a new floating IP.
- Click “Create Floating IP”
- Choose the same region as your VPS
- Confirm the creation
The provider will now generate a public floating IP address for your account.
Example:
203.0.113.10
At this stage, the IP exists but is not yet connected to any server.
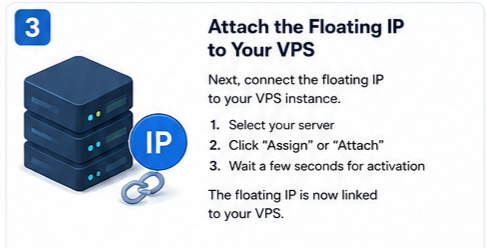
Step 3: Attach the Floating IP to Your VPS
Next, connect the floating IP to your VPS instance.
- Select your server
- Click “Assign” or “Attach”
- Wait a few seconds for activation
The floating IP is now linked to your VPS.
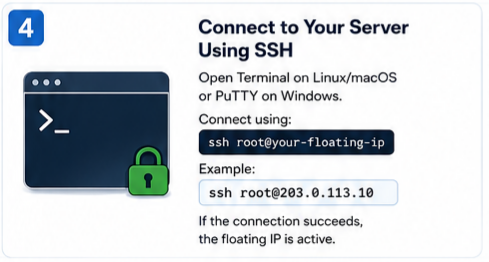
Step 4: Connect to Your Server Using SSH
Open Terminal on Linux/macOS or PuTTY on Windows.
Connect using:
ssh root@your-floating-ip
Example:
ssh root@203.0.113.10
If the connection succeeds, the floating IP is active.
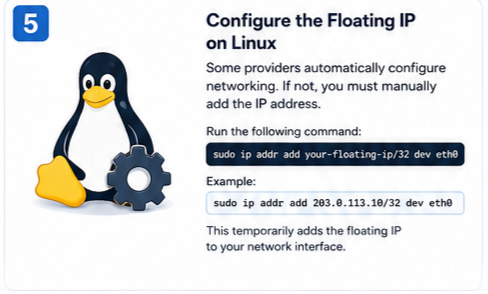
Step 5: Configure the Floating IP on Linux
Some providers automatically configure networking. If not, you must manually add the IP address.
Run the following command:
sudo ip addr add your-floating-ip/32 dev eth0
Example:
sudo ip addr add 203.0.113.10/32 dev eth0
This temporarily adds the floating IP to your network interface.
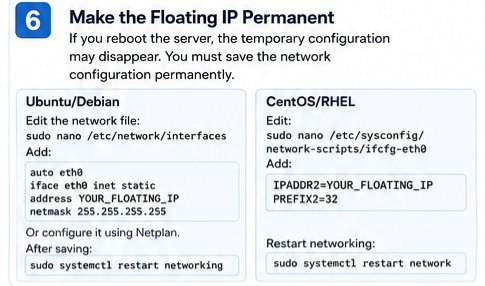
Step 6: Make the Floating IP Permanent
If you reboot the server, the temporary configuration may disappear. You must save the network configuration permanently.
Ubuntu/Debian
Edit the network file:
sudo nano /etc/network/interfaces
Add:
auto eth0iface eth0 inet staticaddress YOUR_FLOATING_IPnetmask 255.255.255.255
Or configure it using Netplan.
After saving:
sudo systemctl restart networking
CentOS/RHEL
Edit:
sudo nano /etc/sysconfig/network-scripts/ifcfg-eth0
Add:
IPADDR2=YOUR_FLOATING_IPPREFIX2=32
Restart networking:
sudo systemctl restart network
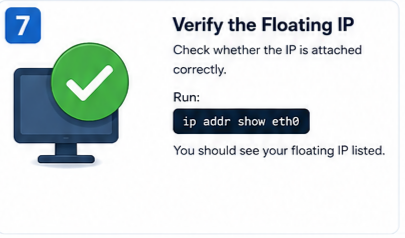
Step 7: Verify the Floating IP
Check whether the IP is attached correctly.
Run:
ip addr show eth0
You should see your floating IP listed.
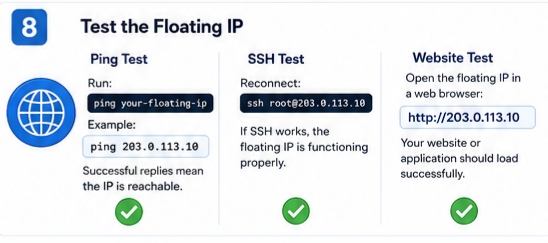
Step 8: Test the Floating IP
Ping Test
Run:
ping your-floating-ip
Example:
ping 203.0.113.10
Successful replies mean the IP is reachable.
SSH Test
Reconnect:
ssh root@203.0.113.10
If SSH works, the floating IP is functioning properly.
Website Test
Open the floating IP in a web browser:
http://203.0.113.10
Your website or application should load successfully.
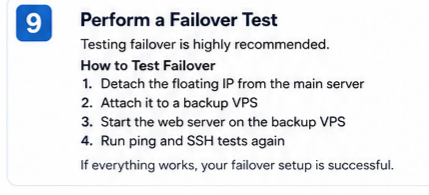
Step 9: Perform a Failover Test
Testing failover is highly recommended.
How to Test Failover
- Detach the floating IP from the main server
- Attach it to a backup VPS
- Start the web server on the backup VPS
- Run ping and SSH tests again
If everything works, your failover setup is successful.
Troubleshooting Common Floating IP Problems
Floating IP Cannot Be Reached
Possible causes:
- Incorrect VPS assignment
- Firewall blocking traffic
- Wrong network interface
- Provider networking delay
Solution:
Check firewall rules:
sudo ufw allow 22sudo ufw allow 80sudo ufw allow 443
SSH Connection Refused
Make sure SSH service is running:
sudo systemctl status ssh
Restart SSH:
sudo systemctl restart ssh
Website Does Not Load
Check your web server status.
For Nginx:
sudo systemctl status nginx
For Apache:
sudo systemctl status apache2
Restart if necessary.
Automating Floating IP Failover
Advanced users often automate failover using monitoring tools and scripts.
Automation usually works like this:
- Monitor the primary server
- Detect failure automatically
- Detach floating IP
- Attach floating IP to backup VPS
- Restart services
This process can be done using:
- Bash scripts
- Python scripts
- Provider APIs
- HAProxy
- Keepalived
- Load balancers
Automation significantly improves reliability and uptime.
Conclusion
Floating IPs are one of the best solutions for improving VPS availability, reducing downtime, and simplifying server failover. Whether you manage a website, application, online store, or game server, floating IPs help maintain uninterrupted access for users.
By following the steps in this guide, you can successfully configure, test, and manage floating IPs on your VPS environment.
